Segments let you pick exactly the right people from your lists, such as "signed up for Harbour Lights but hasn't bought" or "tagged House and joined in the last 3 months". Tags label people, and custom fields hold extra details you can drop into your emails. This guide covers all three.
Segments
Go to Audiences > Segments. Every segment shows how many people are in it, how many you can email and text, which lists it comes from and when it was last counted. The badges show whether it's been sent to Meta or TikTok.
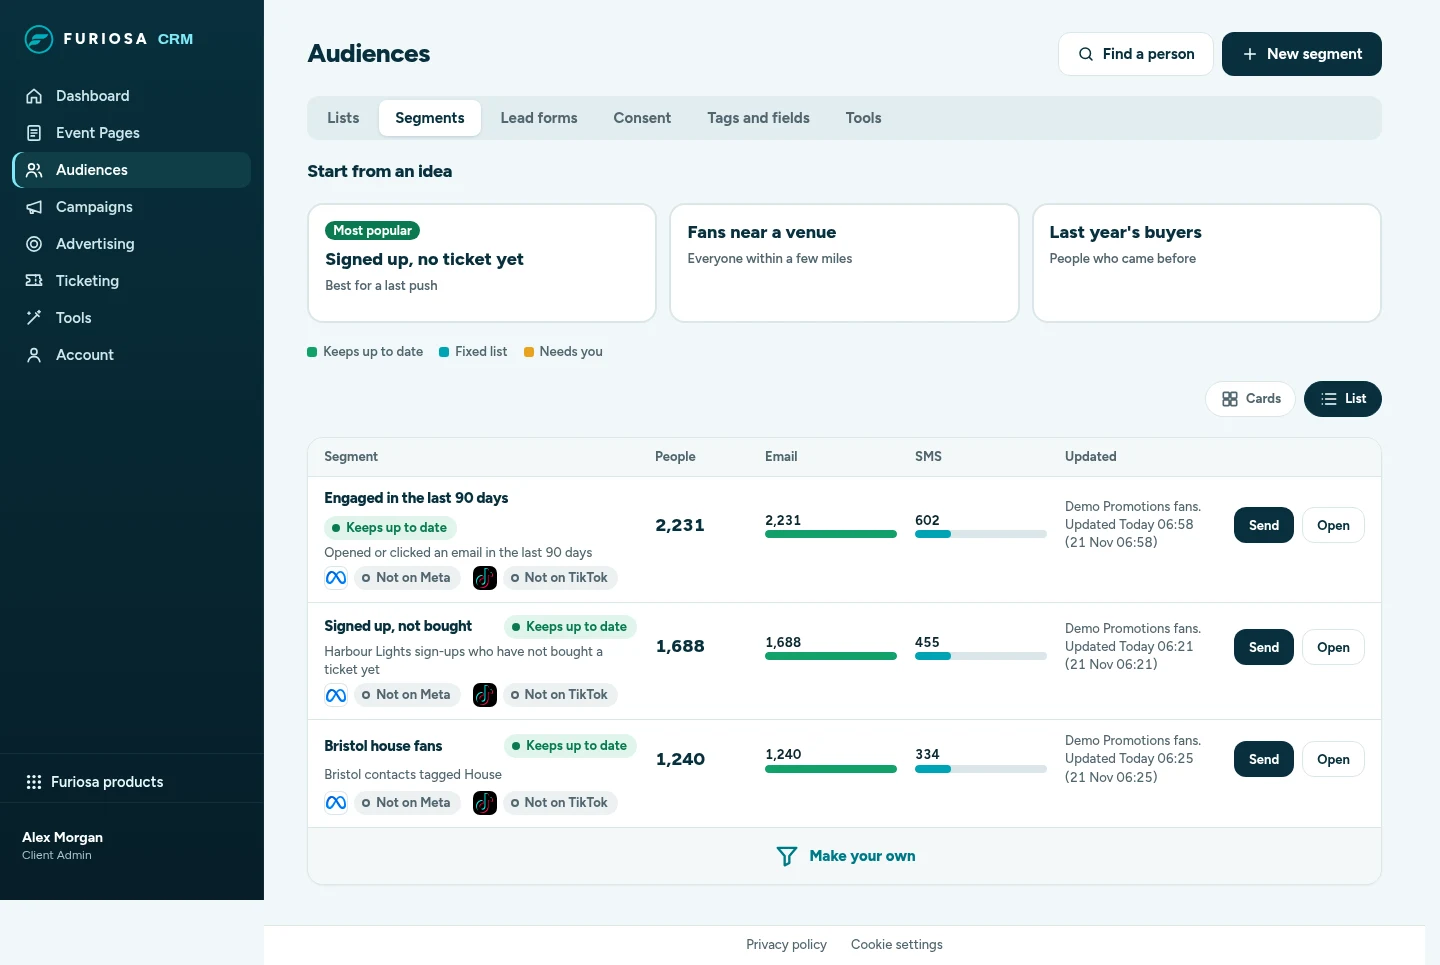
The coloured key tells you what kind each one is:
- Keeps up to date: recounted every morning. New sign-ups join and new buyers drop out on their own.
- Fixed list: the exact people who matched on the day you saved it.
- Needs you: something needs a look from you before the segment can do its job.
Not sure where to start? Pick one of the ideas at the top: Signed up, no ticket yet, Fans near a venue or Last year's buyers. The wizard opens with the right filters ready.
Make a segment
Click New segment (or Make your own). The wizard has four steps.
Step 1: pick lists
Choose one or more lists or groups to start from. Search if you have a lot. People who are on more than one list are only counted once.
Step 2: add filters
Choose whether people must Match all filters or can Match any of them, then add filters:
- Signed up vs bought: who signed up for an event and hasn't bought a ticket yet, or who did both.
- Near a postcode: everyone within a few miles of a postcode or town.
- Bought tickets: who bought, or didn't buy, for an event you choose.
- Signed up for an event: who signed up on a sign-up page.
- Has a tag: any, all or none of the tags you pick.
- Joined recently: added in the last 7 days, 30 days, 3 months, 6 months or a year.
- Leave people out: take out everyone on a list or group. This always applies, whichever way the filters combine.
- Under More conditions: Field (city, source, UTM tags, ticket type, name and more), Date (date added or order date) and Status (active, unsubscribed or bounced).
The Live count on the right updates as you go. It shows how many people match, how many have an email and a phone, and how many each filter keeps. It also tells you if the segment is big enough for Meta (at least 100 people) and TikTok (at least 1,000).
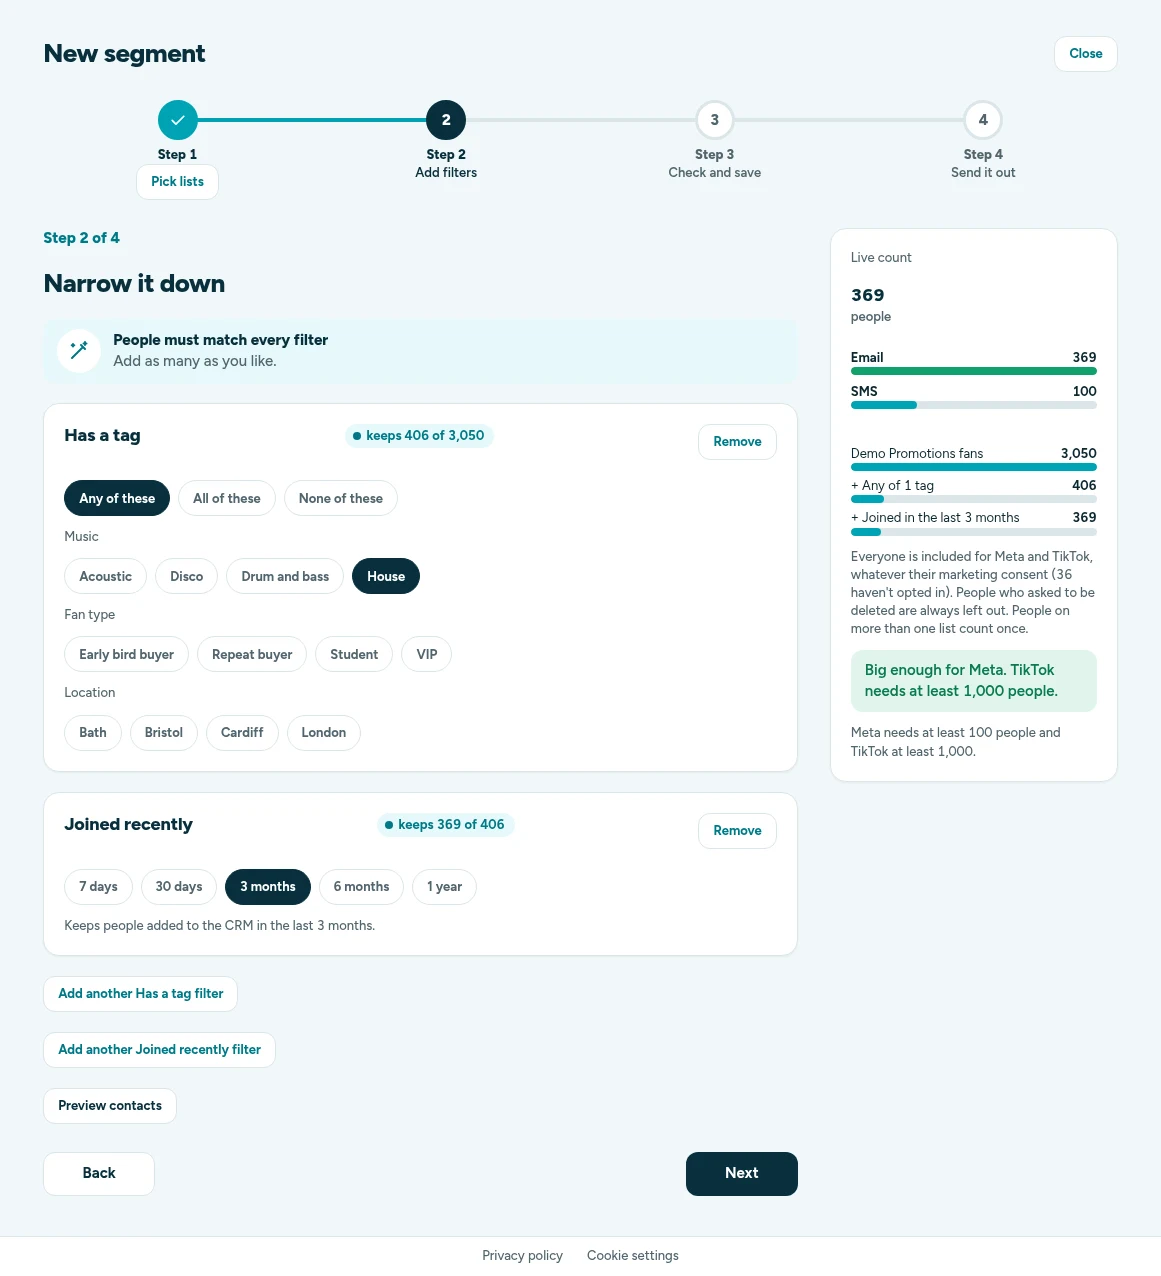
Preview contacts shows a sample of who matches. If your login isn't allowed to download contacts, emails and phone numbers are partly hidden and names are left out.
Step 3: check and save
You see the final figures: how many have an email, a phone, both, and how many can be emailed or texted because they opted in. Give the segment a name and an optional note. Leave Keep it up to date on for a segment that changes by itself, or switch it off for a fixed list of these exact people. Click Save segment.
If your login can download data, you can also download the opted-in people as a CSV.
Step 4: send it out
Choose Message them to start an email, SMS or WhatsApp campaign to the segment, or send it to your ad accounts:
- Tick each Meta or TikTok ad account that should get it. Click Add more ad accounts to connect another.
- Check the Audience name. It starts with "CRM" so you can find it in Ads Manager.
- Choose how often: Update every morning (at 6am, new sign-ups are added and new buyers removed) or Send once (your ad accounts keep today's list, and you can send an update by hand later).
- Click the send button. It tells you how many people will go to your ad accounts.
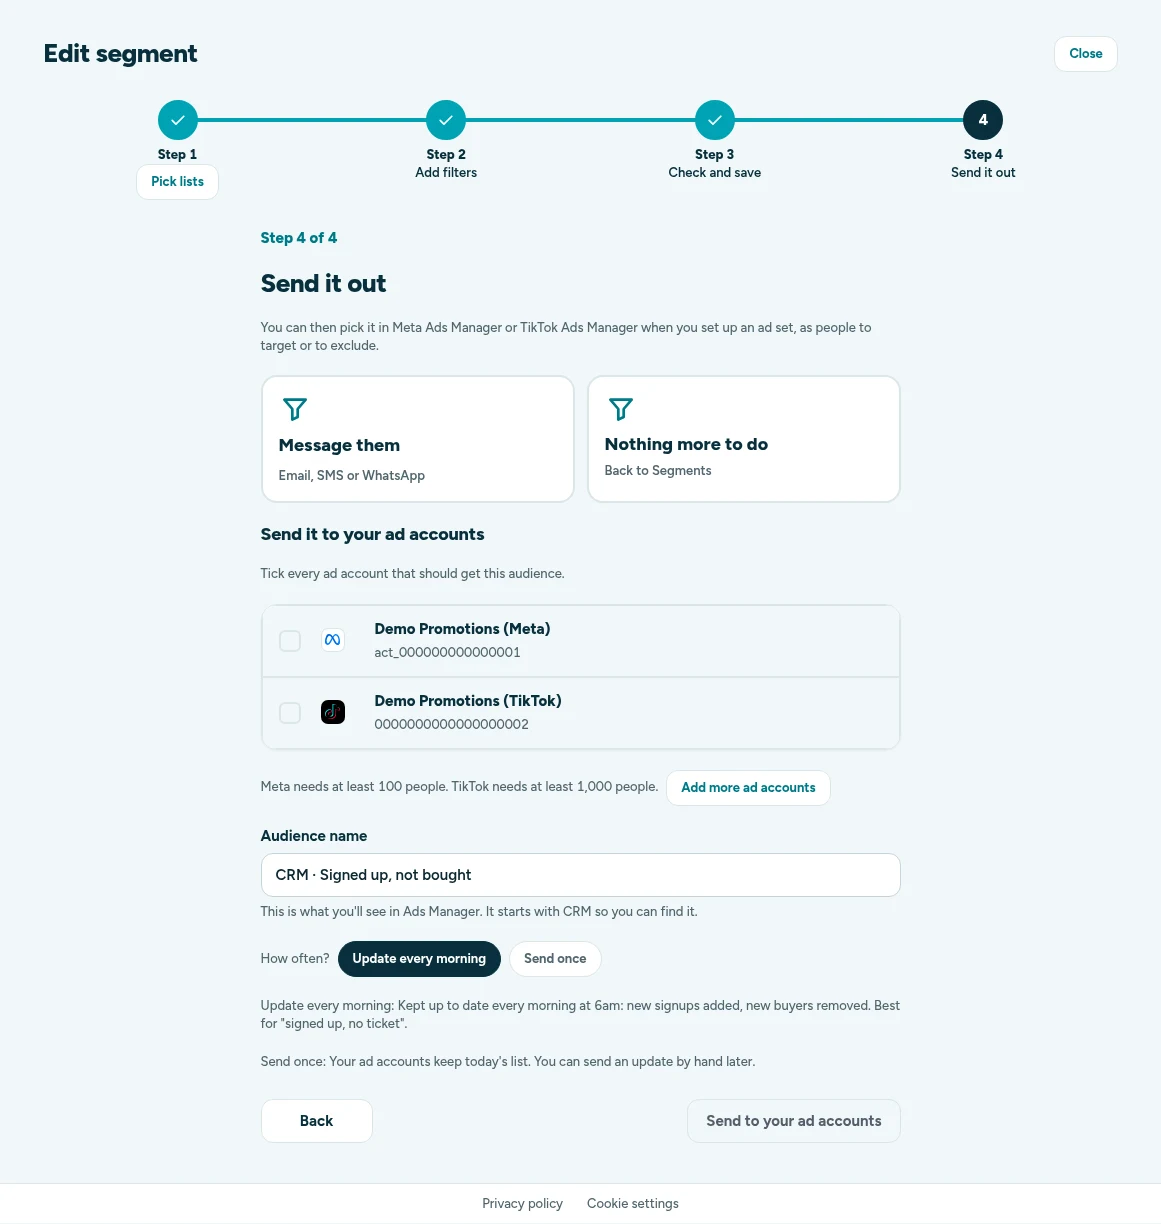
Emails and phone numbers are scrambled (hashed) before they leave the CRM, and names are never sent. Everyone in the segment is included for Meta and TikTok, whatever their marketing consent. People who asked to be deleted are always left out. The audience size shows in Ads Manager within a few hours.
To send a whole list (rather than a segment) to Meta, TikTok or Google Ads, use Advertising > Audiences. See Advertising.
Change a segment
Click Open on a segment to see its details. From there you can Edit filters, Duplicate it, Download CSV (only the people who opted in to marketing), send it to your ad accounts, pause or restart its daily update, or delete it.
Segments from an event
Each event has Make a segment buttons on its Sales and Sign-up campaign tabs. One click makes a ready-named segment of:
- Everyone who signed up
- Everyone who opted in
- Everyone who bought
- Everyone who didn't buy yet
- Everyone who signed up and bought
- Everyone who opened nothing you sent about the event
If you make the same one again, you get the segment you already have. The buyer segments need the event's ticket links confirmed first, and the CRM tells you if they aren't. You then send the segment to Meta or TikTok in the usual way.
Tags
Tags are labels you put on people, such as "VIP", "Student" or "Drum and bass". Go to Audiences > Tags and fields.
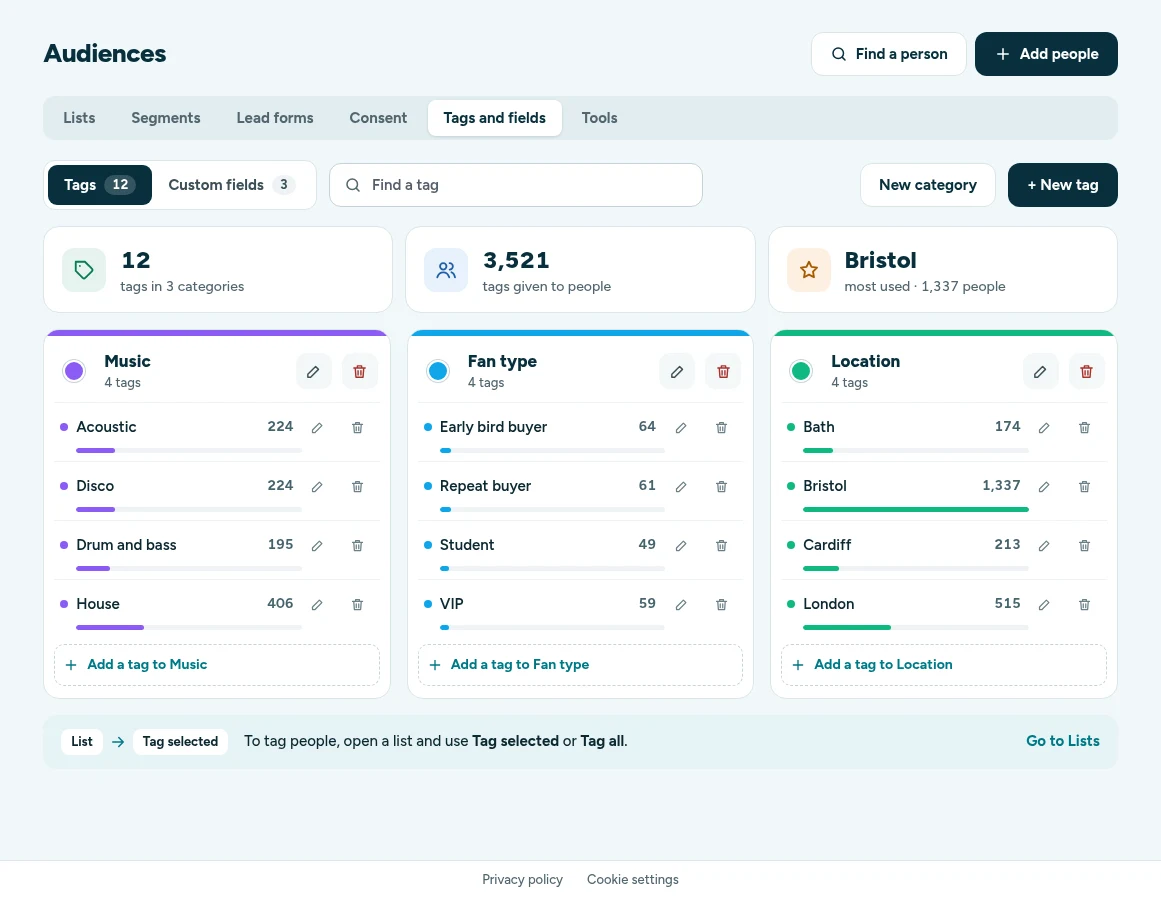
- Make a category: click New category, name it and pick a colour. Categories keep tags tidy, for example Music, Fan type and Location.
- Make a tag: click + New tag, or Add a tag to a category.
- Rename or delete: use the pencil and bin next to a tag or category.
Tag people
- Go to Audiences > Lists and click View on a list.
- On the People tab, tick the people you want and use Tag selected.
- To tag the whole list, open Tag everyone and choose Tag all. Remove all tags takes them off again.
You can also tag a whole group from its card with Tag everyone. Then use the Has a tag filter in a segment.
Custom fields
Custom fields hold details that aren't built in, such as a membership number or a favourite artist. Go to Audiences > Tags and fields and click Custom fields.
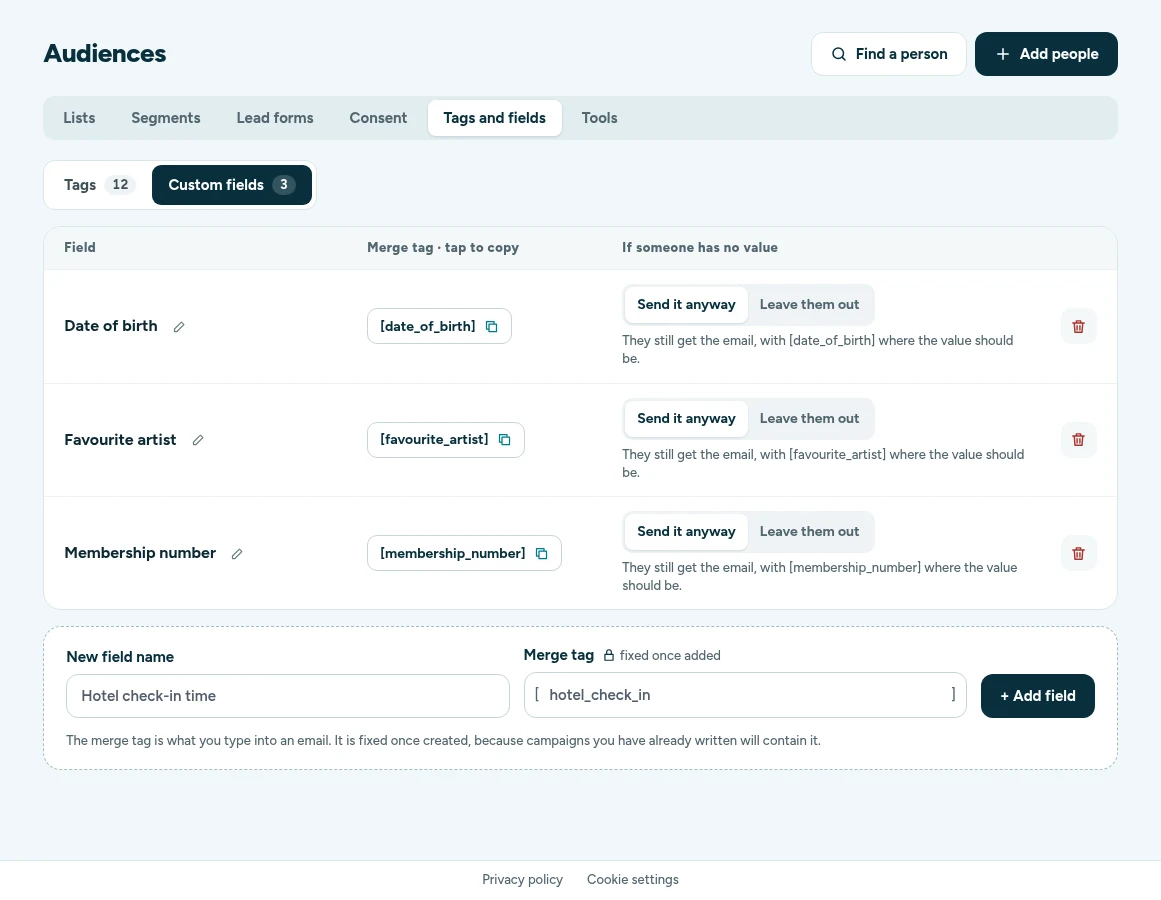
- Type a New field name. The Merge tag fills itself in. You can change it now, but it's fixed once the field is added, because campaigns you've already written may use it.
- Click + Add field.
- Choose what happens when someone has no value: Send it anyway (they still get the email) or Leave them out.
Fill fields by sending a column to them in Add people. Use them in an email by typing the merge tag, for example [membership_number].